Okay, before I get started I just want to apologize about the photos. I used the flash for most of these pictures and didn't realize until it was too late that most of the detail was blown out.
So 2 year old Ace has a cute jumper that will work perfectly for Independence Day this year, but 1 year old Bubbles didn't have anything even remotely patriotic looking. It just didn't seem right to me to take them to the parade on Thursday with one all dressed up but the other not. I rolled several ideas around until I realized that I didn't have to make a completely new outfit as we have plenty of blue skirts and pants that fit Bubbles, just nothing red. I've been purging my closet lately of clothes that don't fit me anymore and had a red tee shirt that I couldn't just throw away. There was too much usable space on it! Any other seamstresses do that?
So the first thing I did was to decide on the style I wanted to go for. At first I was going to use one of the spaghetti strap onesies as my base, and flair it out a bit until I remembered that I already had the perfect shirt for the job! This shirt has these cute straps that button in the front, but I figured that the neckband of the tee would be stretchy enough to work as a one piece neckband.
After that decision was made, it was time to get to work. First off, I laid the baby shirt over the tee and cut around it as my pattern remembering to leave room for selvages.
After I had my two pieces I took one, folded it in half, then cut it deeper to get the right shape for the front of the shirt using the baby shirt as a guide. I also made sure to cut it down to leave room for the neckband.
Here are the two pieces together.
Next I cut the neckband out of the shirt, leaving about 3/8 inches under the band itself for the selvages.
To get the right length I pinned it over the baby shirt. Turns out, I only had to cut about an inch off of it's length.
Now to get sewing! First I stitched the side seams in a quarter inch seam. Sorry, no picture of that step. Then I sewed the armholes. Because jersey fabric is rather foldable and soft I didn't think ironing the seam would do any good. So I held the fabric at a quarter inch and stitched it down...
Then folded it over once more and stitched it again. And there's my fully inclosed armholes.
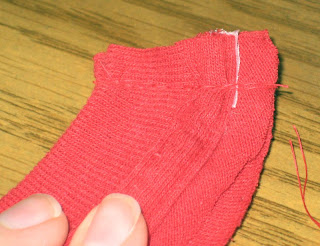
After that, I sewed two lines of basting stitches across the front neckline and pulled them in a little bit. I figured it would be pretty to have all the gathering in the middle since it wasn't very much.
Next to get the neckband ready. Naturally, I started by sewing it together.
Then I decided to stitch the selvages out and down to reduce bulk, and give it a more professional look on the outside.
Then I centered it over both the front and back neck edges, and sewed it in place.
The gathering got a little flattened and smoothed out, but it's still there.
For the hem I did the same as for the armholes, stitching the first fold down, then folding it over a second time. I stitched it at a 5/8 inch seam.
But it still didn't look quite finished. Thankfully, I had a sweet cherry applique that finished it off perfectly. I really like the cherry's as they aren't patriotic, so I will be able to dress my baby in this all summer long without necessarily having to make her look like a flag every time.
Well, I hoped you enjoyed this post and that it will inspire you to re-purpose your old tee shirts instead of just getting rid of them!
Subscribe to:
Post Comments (Atom)


No comments:
Post a Comment